
첫 번째 Step은 간단하니 따라하기 쉬워요😃
github 아이디가 있다는 가정하에 진행하겠습니다.
repository(저장소) 생성
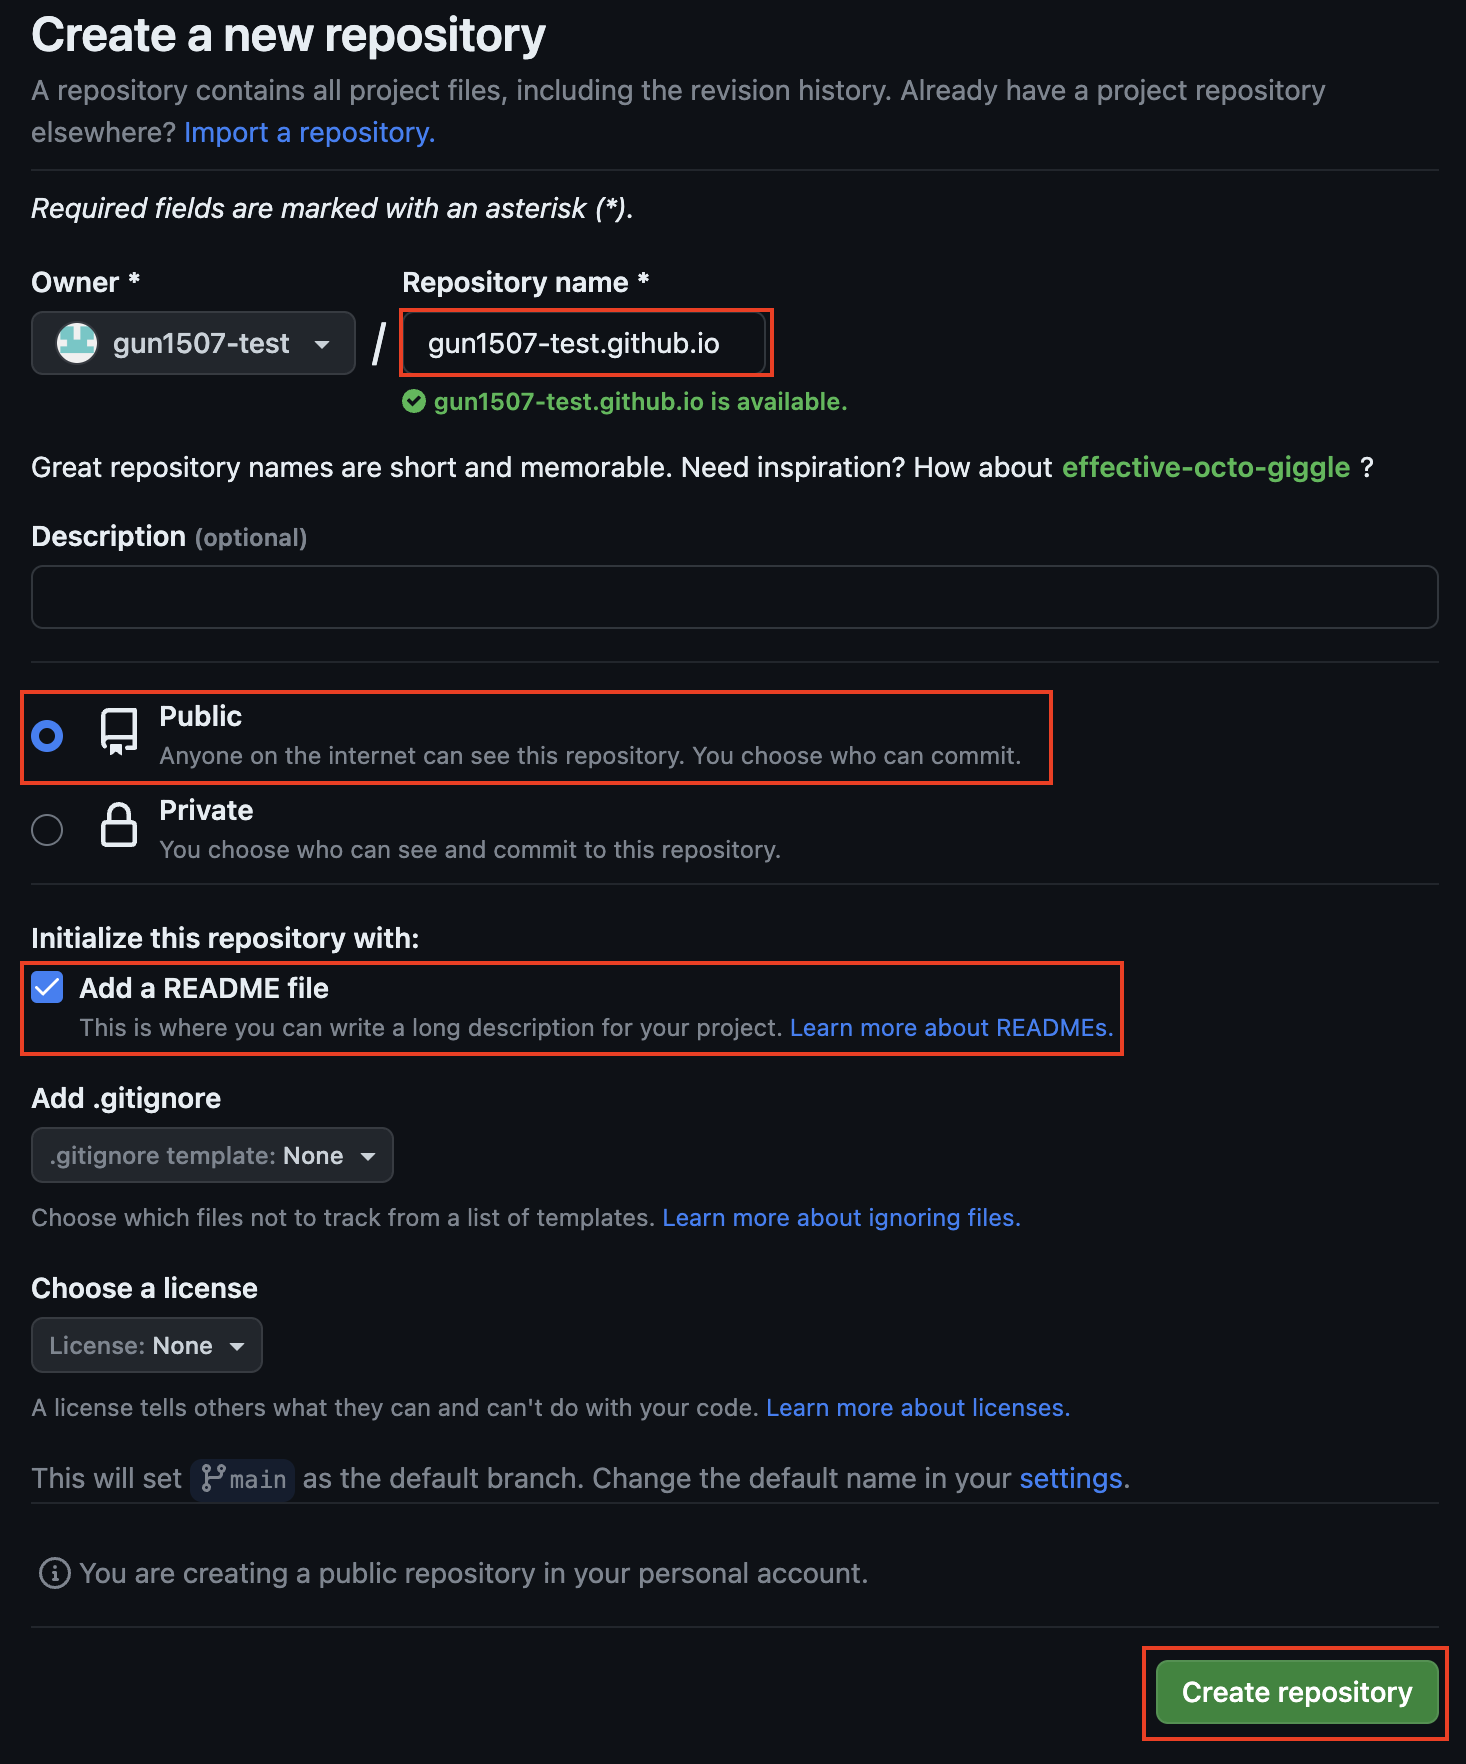 Repository Name 에는
 {Owner}.github.io를 입력합니다.
repository 형태는 public 으로 하고, Add a README file 를 체크합니다.
마지막으로 Create repository 를 합니다.
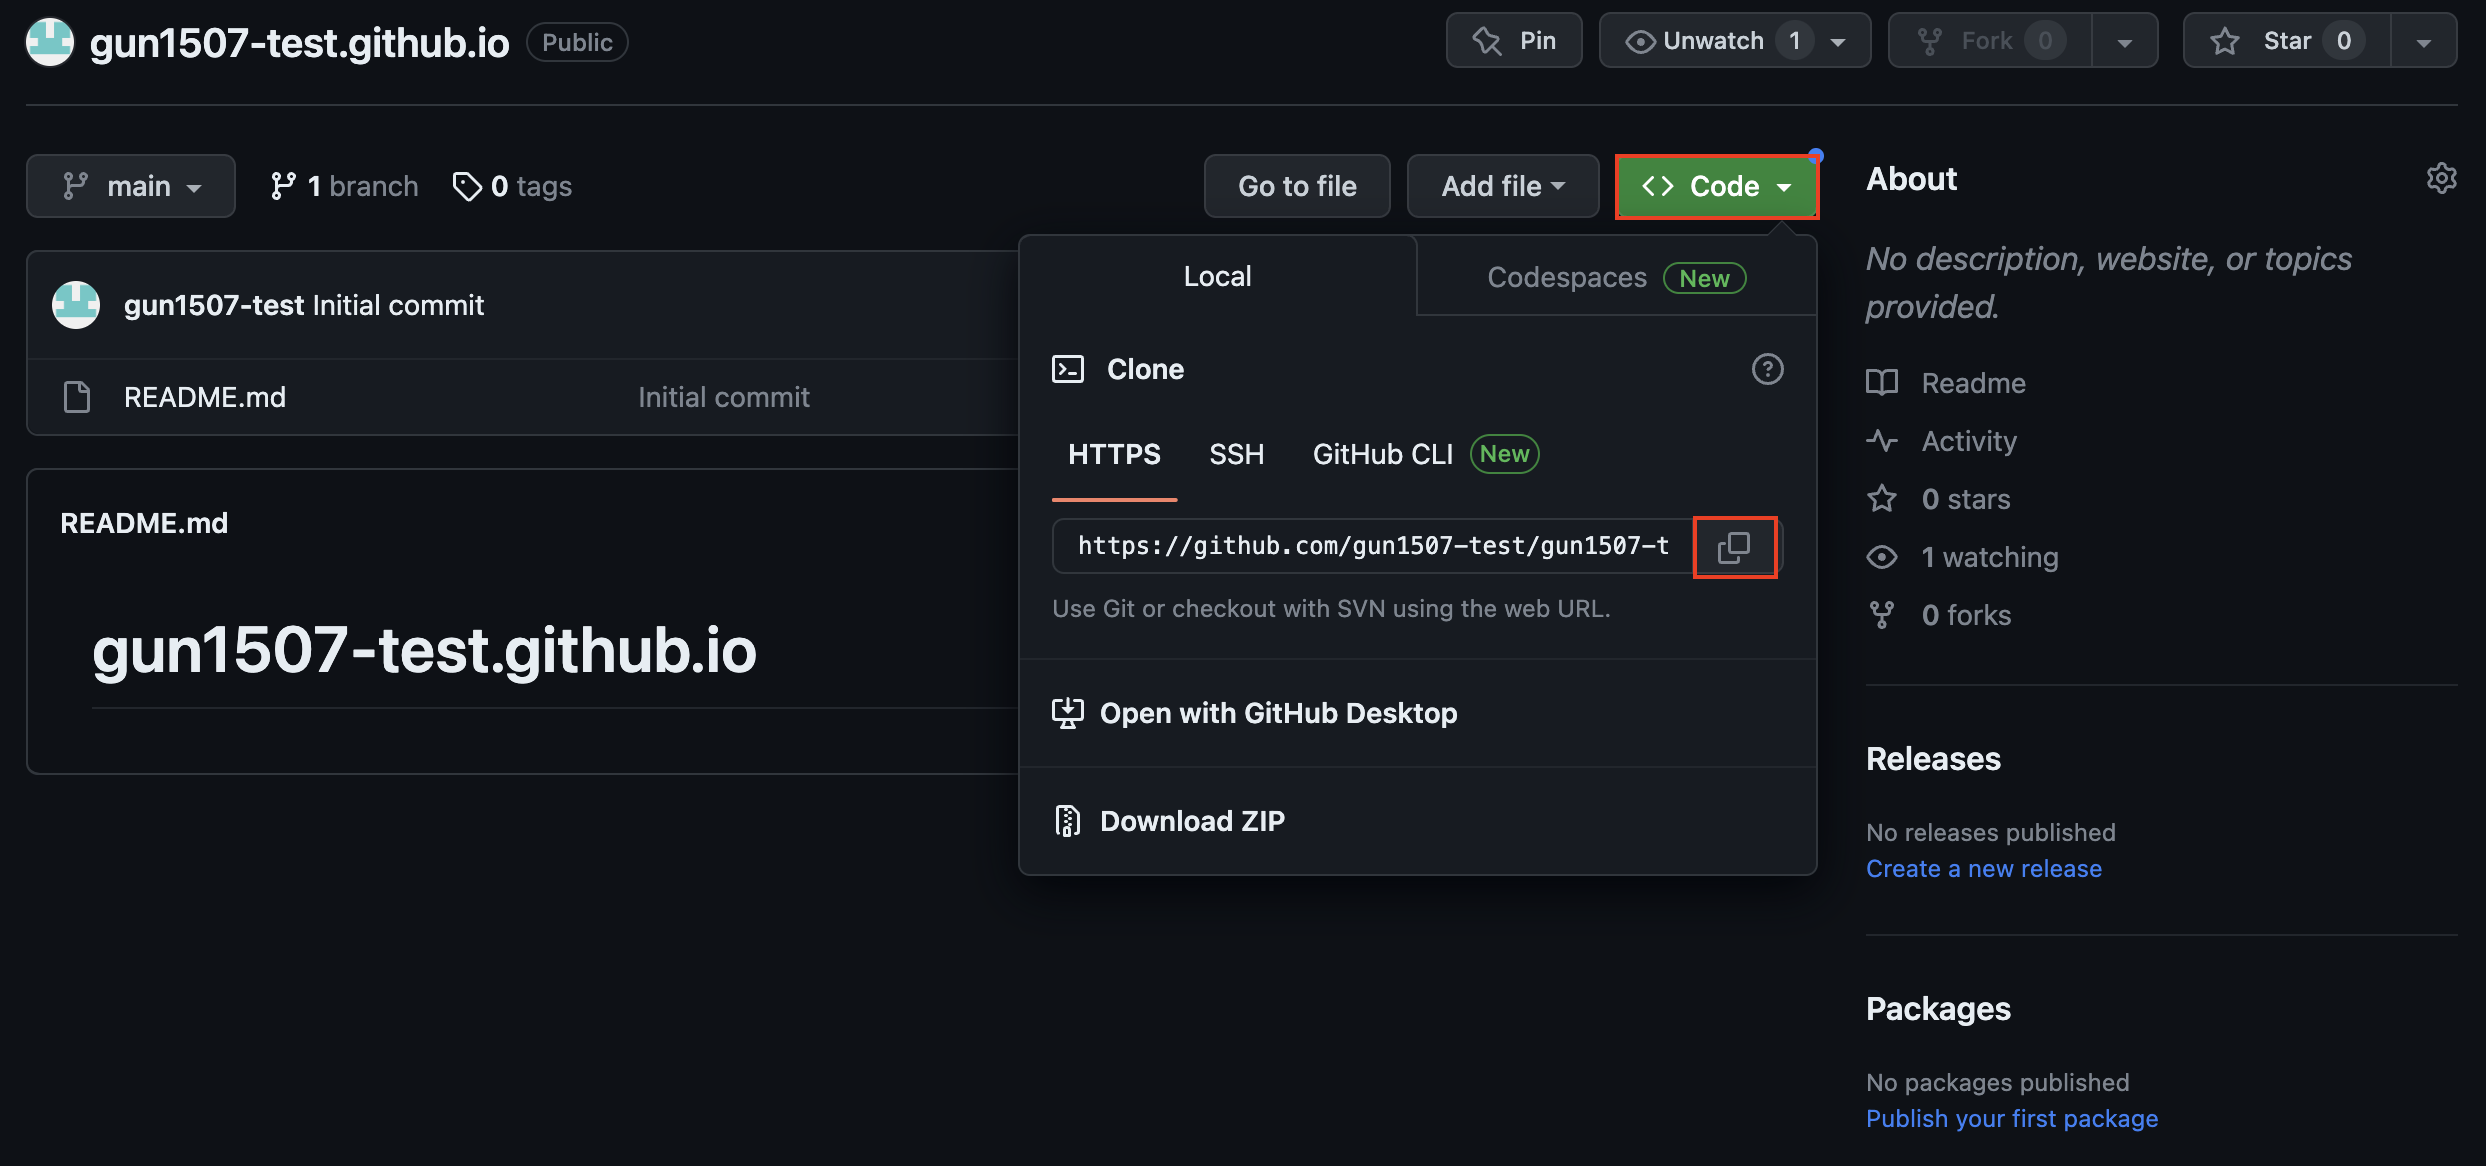 저장소에 만들어진 소스를 로컬에서 다루기 위해 복사를 합니다.
git clone
소스를 가져오고 싶은 곳으로 가셔서 git clone {복사한 repository url} 명령어를 입력합니다.
1
git clone https://github.com/gun1507-test/gun1507-test.github.io.git
원격 저장소에 있던 소스가 로컬에 생겼습니다.
cd {repository name}` 명령어를 통해 해당 폴더로 이동합니다.
1
cd gun1507-test.github.io
index.html 생성
홈페이지에 접속 했을 때 처음 표출되는 화면입니다.
html 으로 구성되어 있으며, 브라우저에서 F12를 눌렀을 때 보여지는 소스입니다.
터미널에 echo "Welcome my blog" > index.html 을 입력합니다.
1
echo "Welcome my blog" > index.html
원격 저장소 push
github에 push를 하기 전에 본인의 repository와 잘 연결이 되어있는지 확인합니다.
1
git remote -v
정상적으로 연결이 되었다면 아래와 같이 표출됩니다.
1
2
origin	https://github.com/gun1507-test/gun1507-test.github.io.git (fetch)
origin	https://github.com/gun1507-test/gun1507-test.github.io.git (push)
git add, commit, push를 진행합니다.
1
2
3
git add .
git commit -m "add - first commit"
git push origin main
git repository action 확인
github page > repository > Actions 경로에서 정상적으로 배포되었는지 확인 가능합니다. 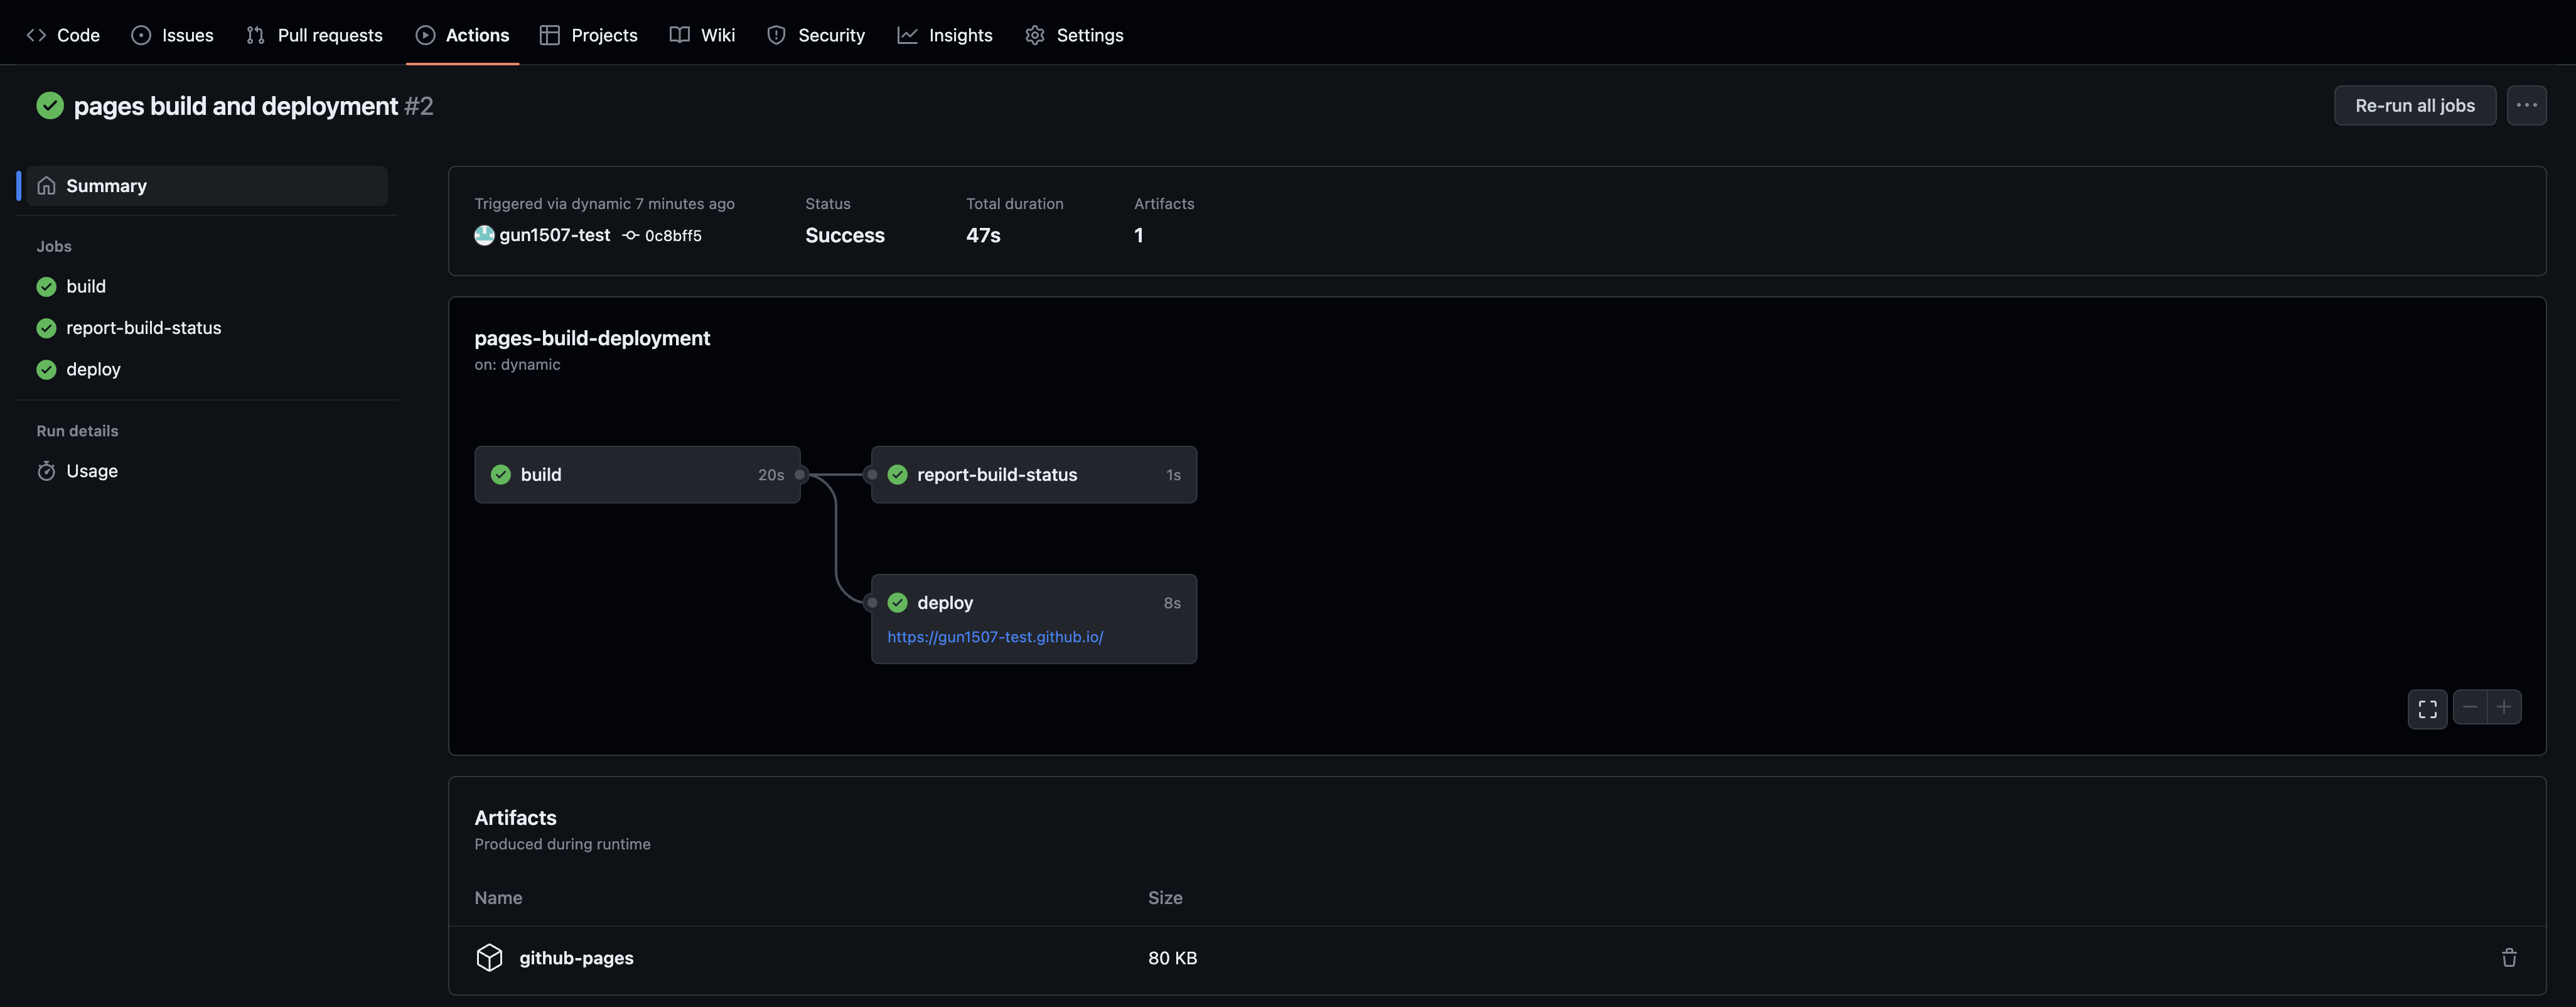
블로그 접근 및 확인
{Owner}.github.io 페이지 접속 후 index.html에 작성한 내용이 표출되는지 확인합니다. 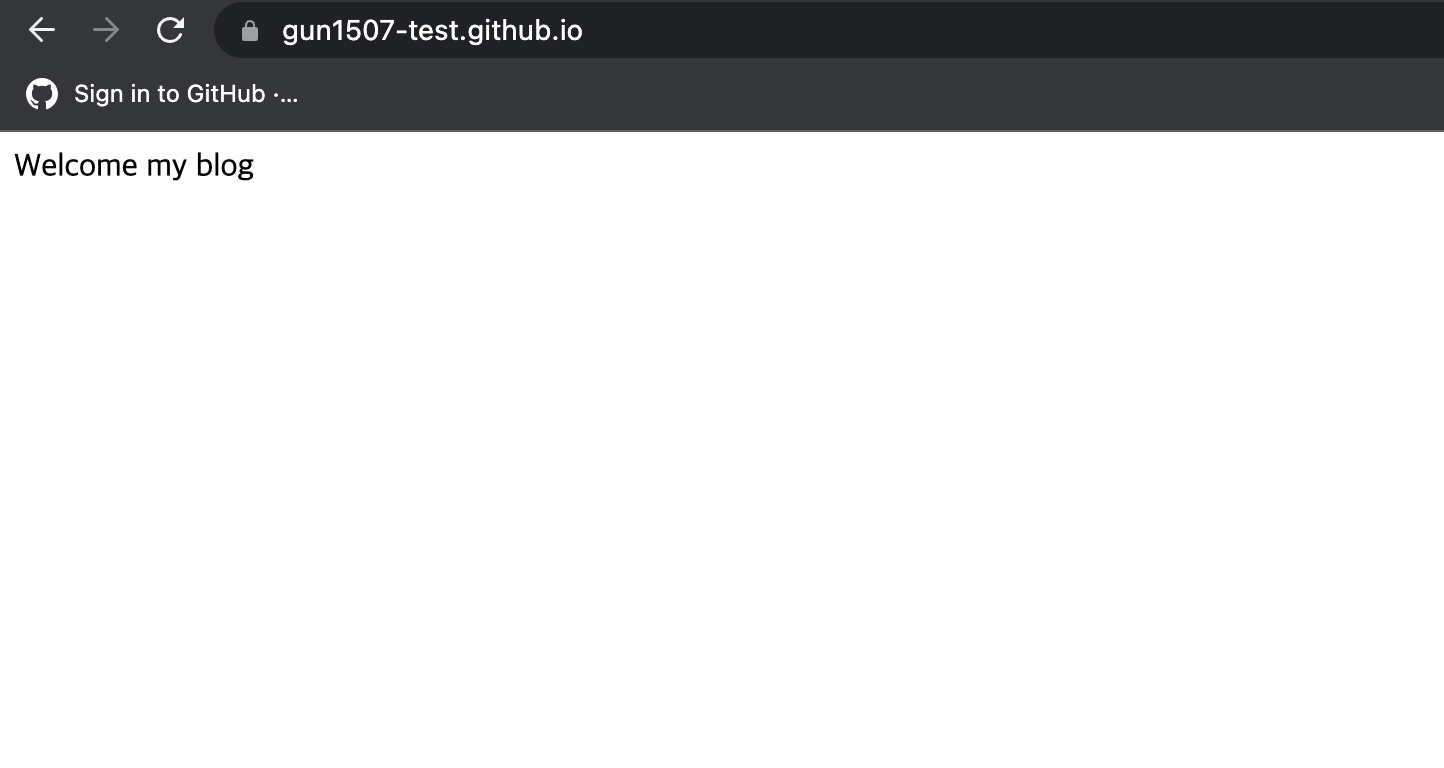
🔥만났던 오류🔥
저장소와 연동되어 있지 않은 경우
git remote -v 명령어 입력 후 repository에 연결이 되어있지 않은 경우
1) git 초기화
1
git init
2) 원격 저장소 연결 : git remote set-url origin {git url}/{Owner}/{repository name}
1
git remote set-url origin https://gun1507-test@github.com/gun1507-test/gun1507-test.github.io.git
3) 연동 확인
1
git remote -v
git push 오류나는 경우
git add, git commit -m “커밋 메세지” 이후 git push를 입력했는데 아래와 같은 오류가 나타난 경우가 있습니다.
1
2
3
git push origin main
remote: Permission to gun1507-test/gun1507-test.github.io.git denied to gun1507.
fatal: unable to access 'https://github.com/gun1507-test/gun1507-test.github.io.git/': The requested URL returned error: 403
원격 저장소에 접근 권한이 없기 때문입니다.
접근 권한을 받기 위해서 토큰을 발급받아야 합니다.
1) token 발급
github page > 프로필 > Settings > Developer Settings > Personal Access Tokens > Tokens(classic) > Generate new token 의 경로에서 아래와 같이 입력하여 토큰을 발급합니다. 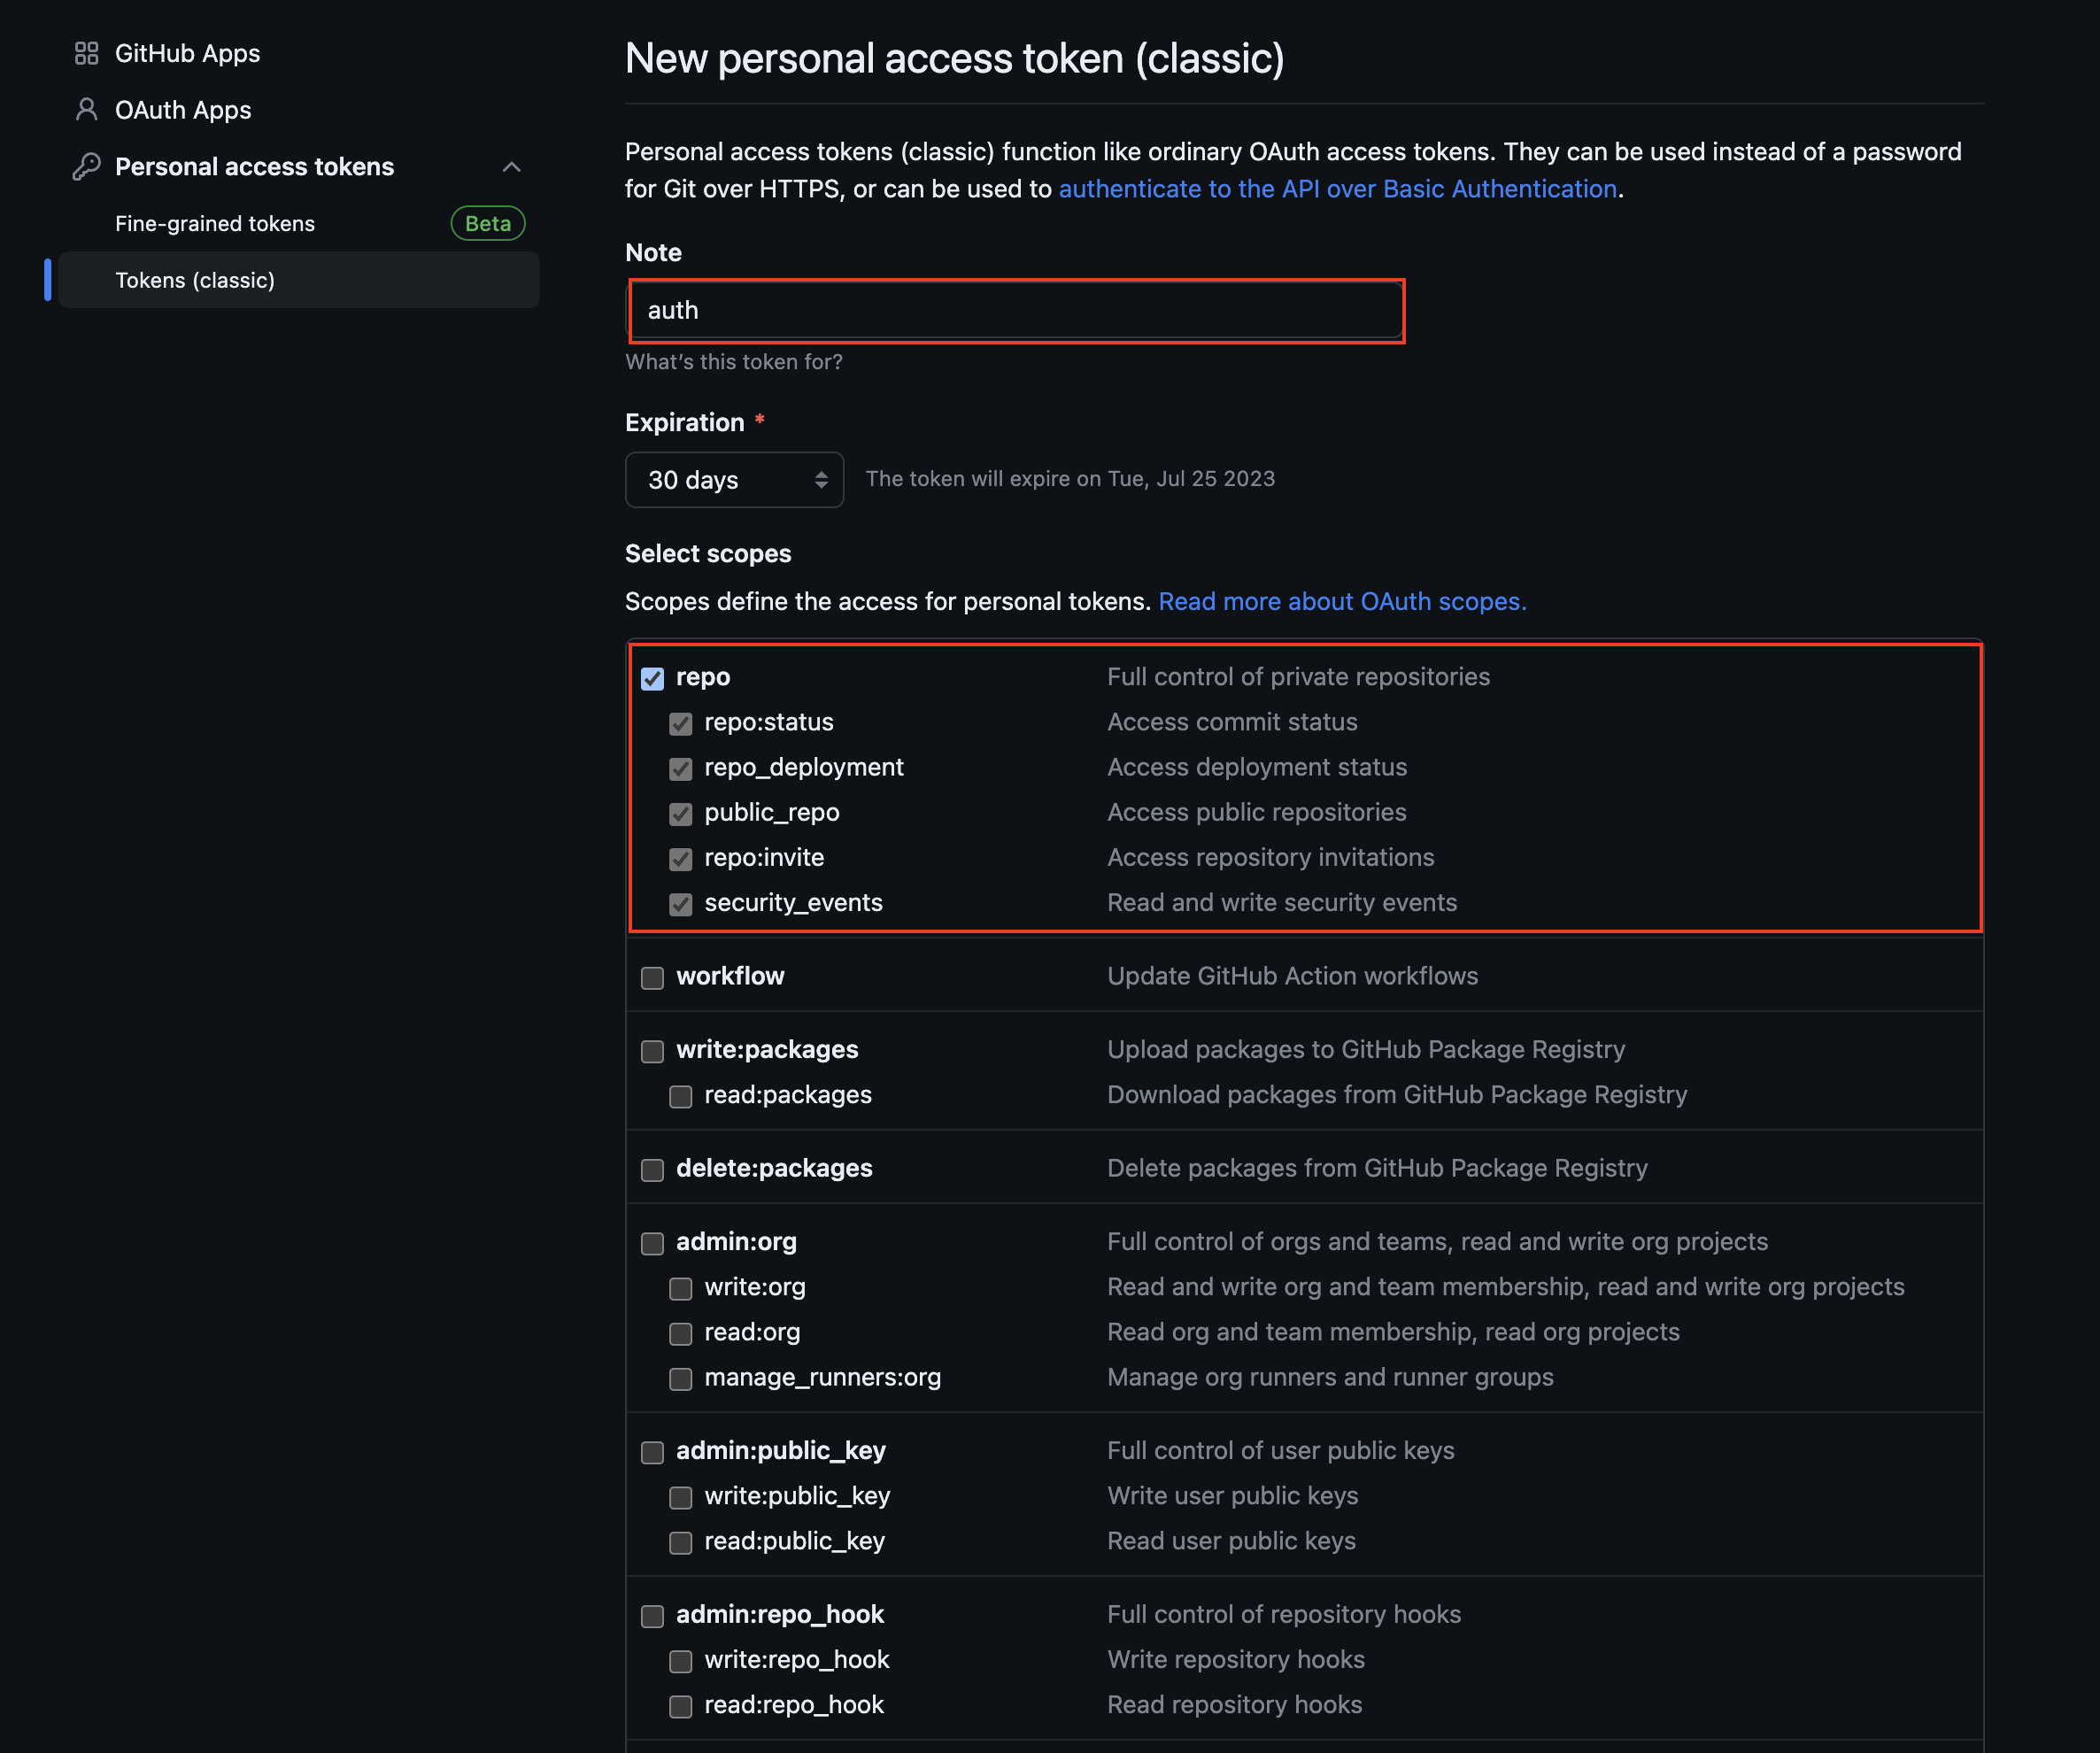
🚨한번 발급된 토큰은 다시 확인할 수 없기 때문에 꼭 저장해두세요!
2) 원격 저장소 연결 : git remote set-url origin {git url}/{Owner}/{repository name}
1
git remote set-url origin https://gun1507-test@github.com/gun1507-test/gun1507-test.github.io.git
3) 패스워드 입력
1
2
3
4
git push -u origin main

# 패스워드 입력 시 복사한 토큰 붙여넣기
Password for 'https://gun1507-test@github.com':